First Time Cleaning Remington Typewriter
Understanding Your Remington Typewriter
Have you ever wondered how to keep your Remington typewriter in perfect shape? Welcome to the world of these amazing machines! Remington typewriters are not just tools; they are pieces of history that have changed how we communicate. Imagine holding a piece of the past in your hands—each keystroke connecting you with stories from long ago.
Keeping your Remington typewriter clean is super important. Dust and dirt can sneak in and make keys stick or even cause jams. If you’re not experienced with cleaning antiques, the idea of tackling this task can be a bit scary. But don’t worry! With some patience and the right approach, you’ll find that first time cleaning your Remington typewriter can be both fun and rewarding.
A clean typewriter works better and looks beautiful, showing off the intricate design and craftsmanship. Whether you’re a seasoned collector or just starting your journey with analog tools, understanding the importance of maintenance is the first step in caring for your Remington typewriter. This guide will walk you through the process of first time cleaning your Remington typewriter, so you can enjoy your piece of history for years to come.
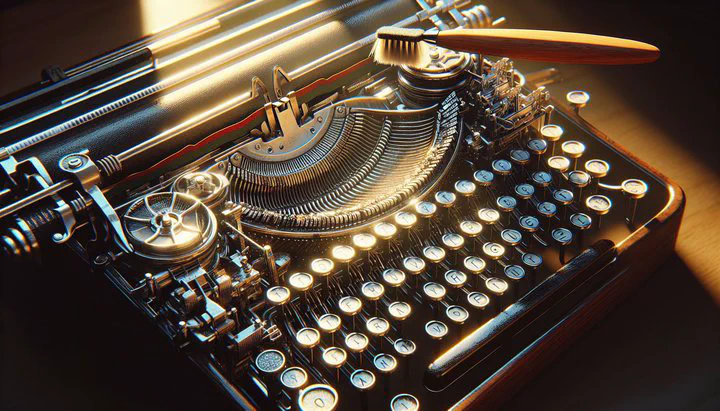
Gathering the Right Cleaning Tools
Before you begin cleaning your Remington typewriter, it’s important to gather the right tools. Having proper brushing equipment and cleaning supplies will make the job easier and help protect your typewriter. Even if you’re not experienced with cleaning antiques, the right tools make all the difference.
First, you’ll need some soft brushes. A small, soft-bristled paintbrush or a makeup brush can gently remove dust from the tight spaces between keys. You can find these at a craft store or in the art supplies section of a local store.
Next, consider getting a can of compressed air. This helps blow out dust from hard-to-reach areas. You can find it in electronics sections or office supply stores. Just keep the can upright to avoid spraying any cold liquid onto your typewriter.
A clean, lint-free cloth is also essential for wiping down the exterior surfaces. Microfiber cloths are great because they won’t scratch and do a good job of picking up dust. For tougher grime, a slightly damp cloth with a mild soap solution can be used, but be careful not to soak the cloth.
Finally, a light lubricant like sewing machine oil is needed to keep the moving parts working smoothly after cleaning. Use it sparingly, as too much oil can attract dust and dirt.
With these tools in hand, you’re all set to start cleaning your Remington typewriter. Whether you find these items at home or pick them up from a store, having the right equipment will make this process easier and more enjoyable.
Step-by-Step Cleaning Process
Now that you’ve gathered all the necessary tools, it’s time to start cleaning your Remington typewriter. If this is your first time cleaning a Remington typewriter, don’t worry! We’ll guide you through each step to ensure your typewriter is sparkling clean and ready for use.
Step 1: Exterior Cleaning
Start with the outside of your typewriter. Use your soft-bristled brush to gently sweep away dust and dirt from the keys and other surfaces. Be patient, as this can take some time. For any stubborn dirt, lightly dampen your microfiber cloth with a mild soap solution and wipe the surfaces gently. Avoid soaking the cloth to prevent moisture from seeping into the typewriter.
Step 2: Using Compressed Air
Next, grab your can of compressed air. Hold it upright and use short bursts to blow away dust from between the keys and other tight spots. This helps clear out debris without needing to take apart any components. It’s a handy trick, especially if you’re not experienced with cleaning antiques and want to avoid any disassembly mishaps.
Step 3: Deep Cleaning the Inside
Now it’s time for a more detailed cleaning inside the typewriter. Carefully open the top cover, if your model allows it, to access the typebars and other internal parts. Use your brush to delicately clean between these parts, removing any dust and ink residue. Take your time with this step, as these parts can be fragile.
If you notice any stubborn grime, use a slightly dampened cloth to clean these areas, but dry everything thoroughly afterward. Deep cleaning it in the inside can greatly improve your typewriter’s performance, so it’s worth the effort.
Step 4: Lubricating Moving Parts
Finally, apply a tiny amount of light lubricant, like sewing machine oil, to the moving parts of your typewriter. This includes the typebars, carriage, and any other areas where metal parts move against each other. Be very sparing—too much oil can attract more dust. A drop or two is usually enough to keep everything moving smoothly.
By following these steps, you’ll have successfully tackled the task of cleaning your Remington typewriter for the first time. Remember, patience is key, and taking your time will ensure the best results. With a little effort, your typewriter will not only look amazing but also work like a charm. And don’t forget, regular cleaning is essential to keep your typewriter in top condition for years to come.
Maintaining Your Typewriter
Congratulations on completing the first time cleaning of your Remington typewriter! Now that your typewriter is looking and working its best, let’s talk about how to keep it that way. Regular maintenance is the secret to ensuring your typewriter continues to perform well and stays beautiful.
Regular Dusting
One of the simplest things you can do is regular dusting. Use your soft-bristled brush or a microfiber cloth to gently remove dust from the keys and other surfaces. Try to do this at least once a week, especially if your typewriter is out on display. This will prevent dust from building up and causing issues later on.
Checking for Loose Parts
Occasionally, check your typewriter for any loose parts or screws. Gently shake the typewriter and listen for any rattling sounds. If you find any loose screws, tighten them carefully. This small step can prevent bigger problems in the future and ensure everything is nice and secure.
Minor Adjustments
Pay attention to how your typewriter is performing. If you notice any keys getting stuck or the carriage not moving smoothly, it might be time for a minor adjustment. Often, a tiny bit of lubricant on moving parts can resolve these issues. Remember to be sparing with the oil, as using too much can lead to more dust sticking to the parts.
Creating a Maintenance Schedule
To make maintenance easy, consider creating a schedule or checklist. This can include weekly dusting, monthly checks for loose parts, and semi-annual deep cleaning. By having a routine, you’ll ensure that your typewriter stays in great condition without feeling like maintenance is a chore.
Enjoy Your Typewriter!
Finally, remember to enjoy using your Remington typewriter. The more you type, the more you’ll learn about its quirks and charms. Each session at the keys is not just a maintenance task but an opportunity to connect with the past and appreciate the craftsmanship of these remarkable machines.
By following these simple maintenance tips, you’ll keep your Remington typewriter in excellent shape for years to come. Whether you’re typing a letter, a story, or just enjoying the tactile feel of the keys, your well-maintained typewriter will be a trusty companion on your analog journey.