How to Make Flat Notecard Set with Patterned Back
Introduction to Fine Art Stationery
Welcome to the wonderful world of fine art stationery, where you can mix creativity and beauty. Imagine the joy of crafting your own personalized notecards, each one a unique expression of your style. Fine art stationery is more than just paper and ink; it’s about creating beautiful, functional pieces that reflect your personality and bring joy to both the sender and the receiver. If you’ve ever been captivated by the intricate designs of a notecard set, you’re not alone. More and more craft enthusiasts are diving into the world of fine art stationery, discovering the art of turning simple materials into something extraordinary.
Creating a flat notecard set with patterned back is a delightful way to start your journey into this creative realm. These notecards combine aesthetics and functionality, offering a touch of sophistication to your correspondence. With a patterned back, each notecard becomes a small canvas, allowing you to explore various designs and themes. Whether you prefer bold colors or subtle hues, the choice is yours, and the result is a truly personalized creation.
The appeal of fine art stationery lies in its ability to transform everyday writing into an art form. A flat notecard set with a pattern on the back of the cards adds an unexpected twist, making even the simplest note feel special. As you explore the possibilities of fine art stationery, you’ll find endless opportunities to express yourself and make each piece a work of art. This craft invites you to experiment, to play with patterns, and to discover the satisfaction that comes from creating something beautiful with your own hands. So why not start today and see where your creativity takes you?
Materials Needed for Your Notecard Set
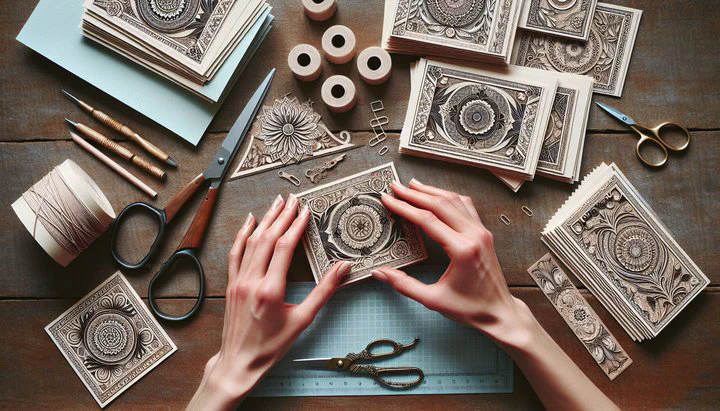
Before you dive into crafting your very own flat notecard set with patterned back, it’s important to gather all the materials you’ll need. Choosing the right supplies will not only make the process more enjoyable but will also ensure your notecards look professional and beautiful. Here’s a detailed list of what you’ll need to get started:
-
Card Stock: This is the foundation of your notecard set. Choose a high-quality card stock in a color that complements your chosen patterns. The thickness of the card stock is important—it should be sturdy enough to stand on its own but still easy to cut and fold.
-
Patterned Paper: This is where you can let your creativity shine! Select patterns that you love and that reflect your personal style. You can find a variety of designs at craft stores or even create your own using stamps, paints, or digital printouts.
-
Adhesives: To attach the patterned paper to the back of your cards and to line the envelopes, you’ll need a reliable adhesive. Double-sided tape or a glue stick will work well for this purpose. Make sure the adhesive is strong enough to hold the paper in place without causing wrinkles or bubbles.
-
Tools: You will need scissors, a ruler, and a tool to help fold the paper smoothly, like a bone folder. A cutting mat can also be helpful to protect your workspace.
-
Envelopes: Consider whether you want to pay extra for the lined envelopes, as they add a touch of elegance to your notecard set. You can match the lining to the pattern on the back of your cards for a cohesive look.
Selecting the right materials is crucial for achieving the best results. High-quality supplies will enhance the overall appearance and durability of your notecards. Remember, the patterns and colors you choose are a reflection of your unique style, so take your time exploring different options. Whether you go for bold, vibrant patterns or soft, subtle designs, your flat notecard set with the pattern on the lined envelopes will be a beautiful expression of your creativity. Happy crafting!
Step-by-Step Guide to Crafting Your Notecard Set
Ready to bring your creativity to life? Let’s dive into crafting your very own flat notecard set with patterned back. This step-by-step guide will walk you through the process, making it easy and enjoyable. So, gather your materials and let’s get started!
-
Cut Your Card Stock: Begin by cutting your card stock to the desired size for your notecards. A common size is 4x6 inches, but feel free to adjust this to suit your needs. Use a ruler to guide your cuts. A craft knife helps make straight edges. Remember, this card stock is the foundation of your notecards, so take your time to ensure each piece is perfect.
-
Prepare the Patterned Paper: Next, select your patterned paper and cut it to fit the back of your notecards. The pattern should cover the entire back, so make sure the dimensions match exactly. This is where you can really let your personality shine! Choose patterns that speak to you, whether they’re bold and colorful or soft and elegant.
-
Adhere the Patterned Paper: Using your adhesive, attach the patterned paper to the back of each card. Double-sided tape works great for a smooth finish. Start from one edge and slowly press down to avoid any bubbles or wrinkles. This step transforms your simple cards into a flat notecard set with a pattern on the back of the cards, adding a special touch to each note.
-
Line the Envelopes: Now it’s time to add a bit of luxury by lining your envelopes. Cut your patterned paper to fit the inside of the envelopes, leaving a small border around the edges. Apply adhesive to the top flap and carefully insert the lining. This step not only enhances the aesthetic but also makes your flat notecard set with the pattern on the lined envelopes truly cohesive.
-
Personalize Your Notecards: Once the basics are complete, consider adding personal touches. You might add a monogram, a small illustration, or even a handwritten quote to the front of the card. This customization makes your notecards even more unique and special.
By following these steps, you’ve created a beautiful, personalized flat notecard set with patterned back. Each card is a reflection of your creativity and style, and the lined envelopes add that extra bit of elegance. Whether you’re crafting these for personal use or as a thoughtful gift, the effort and attention to detail will surely be appreciated. Enjoy the satisfaction of having crafted something beautiful with your own hands!
Exploring Patterns and Designs
Choosing the right patterns and designs is where your creativity can really shine when crafting your flat notecard set with patterned back. Patterns are more than just pretty designs—they can set the tone and mood of your notecards, making them a true reflection of your personal style. Let’s dive into some ideas and tips for selecting the perfect patterns for your project.
First, think about the theme or mood you want your notecards to convey. Are you aiming for something classic and timeless, or are you more drawn to modern and bold designs? If you’re unsure, start by exploring different styles. Classic patterns like florals or stripes can give your notecards an elegant look, while geometric shapes or abstract prints can add a modern twist. Each style brings its own personality, so don’t hesitate to experiment until you find what feels right for you.
Next, consider how your patterns will work together. If you’re lining your envelopes with a pattern, try to match or complement the pattern on the back of the cards for a cohesive look. This could mean using the same design for both or choosing patterns in similar color palettes. A harmonious design will make your flat notecard set with the pattern on the lined envelopes feel thoughtfully curated and polished.
Remember, the colors you choose are just as important as the patterns themselves. Bright, vibrant colors can make your notecards pop, while softer, muted tones can create a more subtle and sophisticated feel. What colors and patterns speak to you? Think about the message you want to send with your notecards and choose colors that align with that message.
Lastly, don’t forget that patterns can also tell a story. Perhaps you choose a pattern that reminds you of a favorite place or one that reflects a personal interest. This adds an extra layer of meaning to your notecards and makes them even more special to give or keep.
In the end, exploring patterns and designs is all about discovering what resonates with you. With so many options available, you’re sure to find the perfect combination that makes your flat notecard set with a pattern on the back of the cards truly unique. Enjoy the process and let your imagination guide you to create notecards that are as beautiful as they are personal.
Conclusion and Invitation to Share
Congratulations on crafting your own flat notecard set with patterned back! You’ve taken a creative journey into the world of fine art stationery, combining beauty and function to produce something truly special. Crafting these notecards is more than just a hobby; it’s a way to express your personal style and bring joy to those who receive your handwritten notes.
Creating a flat notecard set with a pattern on the back of the cards offers a unique twist that elevates your stationery. Each card is a testament to your creativity and attention to detail. The addition of lined envelopes, especially when you choose to pay extra for the lined envelopes, adds an elegant touch that completes the set. Your notecards are now not just a means of communication, but small works of art that convey thoughtfulness and care.
We hope this experience has inspired you to keep exploring and experimenting with patterns, colors, and designs. The satisfaction of creating something with your own hands is immensely rewarding, and the possibilities in the realm of fine art stationery are endless. Whether you continue making notecards, dive into other projects, or share your creations with friends and family, know that you’ve taken a step deeper into the delightful world of analog crafts.
We would love to see what you’ve made! Share your flat notecard set with the pattern on the lined envelopes and any personal touches you’ve added. You can post your creations in the comments below or join our community on subreddits like stationery or bookbinding. Your ideas and experiences can inspire others who are diving into the world of fine art stationery. Discuss your challenges and successes with the community and inspire fellow enthusiasts.
Thank you for crafting with us at The Craft Chronicle. We can’t wait to see where your creativity takes you next! Happy crafting!